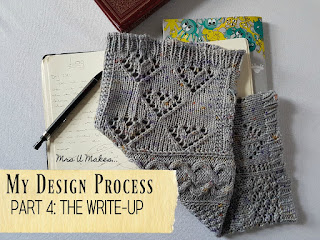
My Design Process - Part 4: The Write-Up
This is the final part of My Design Process series, this is the area where I tend to procrastinate because I'm eager to start on the next project. I find that the longer I leave it, the more laborious it feels to do.
I write out the pattern as I'm working on it, though I have heard of some designers writing out their pattern before they start. This is what I used to do, but I found that I made so many changes that it didn't seem to be a good use of my time.
I've also written out the pattern instructions after finishing the project. This was a big mistake as I forgot some of the things I did and had to work a mini sample of certain sections or mentally reverse engineer what I had done. I don't advise doing this...PLEAS DON'T DO IT.
All my patterns have the same format and I have a template already set up. When doing the write-up I always begin with the basic abbreviations, such as K=knit, P=purl, St/s=stitch/es etc. I'll add the other abbreviations as I come across them when writing the pattern. Next it's the pattern itself, I highlight in red and use symbols when something may need to be changed or size variations need to be added.
If I'm adding pictures, I'll initially use a random one just to hold the place. Once the pattern has been written up, I'll go back and address the areas I've highlighted. I may not address all of these at this point, the fact that they are highlighted means they'll always come to my attention whenever I read through the pattern.
The parts of the pattern that give information about the yarn, tools, gauge and so on, are where I move to next. Again, I may not do everything all at once, but I will put rough estimates and then add the correct information as I get it.
The next stage is one of the most important, but it's also the one that a lot of people overlook. It's the romance section, or the introduction. This tells the story of how or why you made this pattern. I leave this to the end so that I can get some inspiration from the actual write up itself.
Once all the text has been added, I will insert the pictures and also work on the title page. The final draft is read several times before being committed to PDF format and sent to testers*.
When testing is complete, I take on board the comments and suggestions made by my testers and make the necessary changes (I'm yet to use a tech editor, however, this is something I do plan to do in future). I read through a few more time, and then it's done.
When I've finished writing up a pattern I feel relieved, proud, and anxious all at the same time. This thing I've been working on is ready to go out into the world, will people like it? Will they understand it? Will they see a mistake that neither myself nor my testers picked up on? What will I make next? All these questions rush through my mind, and I have to remind myself to focus on the positives and that I'm doing what I love.
I hope you have enjoyed this series and that it has helped you in some way.
I'd love to hear about your design process. Where do you draw inspiration? How do you go from idea to finished pattern?
*If you are interested in becoming a tester, join the Ravelry group. I will put out a call for testers, here, when needed.


Comments
Post a Comment
Thanks for stopping by. I would love to know what you think.